How to Plan Outdoor Lighting Upgrades on a Budget (Expert Guide)
Illuminating exterior residential environments involves an intricate convergence of electrical engineering principles, landscape architecture, photometrics, and fiscal discipline. Property owners frequently approach outdoor illumination as a collection of isolated retail purchases rather than a coherent, systemic deployment of infrastructural networks. Consequently, when strict capital constraints dictate the parameters of a project, the objective shifts away from immediate visual gratification toward maximizing functional yield per dollar invested. Furthermore, this transition demands a structural shift in perspective, moving past superficial hardware aesthetic choices toward scalable, durable design patterns capable of weathering climatic extremes, mechanical stress, and rapid technological obsolescence.
In addition, the underlying economics of property modification are governed by hidden multipliers that casual planners routinely overlook. Inexpensive consumer-grade components often necessitate premature replacement cycles, inflating the total cost of ownership through repetitive labor, wiring degradation, and frequent component burnout. Conversely, over-engineered commercial assets introduce prohibitive upfront expenditures that yield negligible marginal utility for standard residential footprints. Therefore, navigating this tension requires an analytical framework that prioritizes strategic infrastructure placement over indiscriminate landscape saturation. By isolating high-impact safety zones, mastering electrical load physics, and leveraging modular component assemblies, property owners can achieve sophisticated architectural outcomes without incurring disproportionate debt or ongoing maintenance liabilities.
Achieving true financial efficiency in outdoor modifications relies entirely on disciplined sequencing. Rushing to bury cabling or mount fixtures before establishing a rigorous spatial layout invariably yields wasted materials, suboptimal beam angles, and painful retrofits. Meanwhile, financial prudence in this domain is synonymous with precision planning, accurate electrical load calculations, and a clear-eyed assessment of nighttime spatial ergonomics. Ultimately, this resource provides a comprehensive roadmap for learning how to plan outdoor lighting upgrades on a budget, dissecting every financial, technical, and spatial variable required to execute a resilient, long-lasting architectural lighting strategy.
Understanding how to plan outdoor lighting upgrades on a budget
The phrase how to plan outdoor lighting upgrades on a budget is frequently reduced to a shorthand directive for finding discounted fixtures on hardware store clearance racks. Naturally, this surface-level perspective fundamentally misunderstands the physics and operational economics of exterior illumination. A financially restrained upgrade is not a simple exercise in cost-cutting; rather, it is a rigorous exercise in resource optimization. Moreover, it requires balancing lumen output, color temperature consistency, mechanical durability, and electrical conversion efficiency against strict fiscal caps.
Common misunderstandings stem from the retail illusion that hardware purchase costs equal total project execution costs. In reality, purchasing light fixtures often accounts for less than half of the true capital outlay once wiring matrices, step-down transformers, trenching tools, mounting hardware, and potential electrical code compliance modifications are accounted for. Another pervasive oversimplification is the assumption that higher luminous intensity equates to enhanced security or superior aesthetics. Consequently, indiscriminate placement of high-lumen floodlights creates harsh shadows, invasive light pollution, and visual fatigue, actively degrading the nocturnal utility of a landscape while inflating electricity consumption.
A rigorous approach to how to plan outdoor lighting upgrades on a budget requires shifting focus from itemized price tags to comprehensive lifecycle cost analysis. A weather-sealed, solid brass or cast-aluminum fixture with replaceable LED modules demands a higher initial capital outlay than an integrated plastic housing with a permanently sealed diode. However, when the plastic housing fails due to ultraviolet degradation or moisture migration within twenty-four months, the forced replacement cycle erodes any initial savings. Thus, true budgetary efficiency evaluates cost-per-year of operational life, factoring in energy consumption rates, maintenance labor, and replacement frequency.
Deep Contextual Background: The Evolution of Residential Exterior Illumination
The structural economics of residential exterior illumination have transformed radically over the past three decades. Historically, exterior lighting was dominated by high-voltage (120V) incandescent and halogen systems. These setups required rigid compliance with strict municipal electrical codes, deep trenching specifications (often 18 to 24 inches below grade), heavy metallic conduit networks, and robust junction boxes to prevent ground faults and water penetration. Consequently, the installation labor alone routinely equaled or exceeded the cost of the physical hardware, placing comprehensive landscape illumination out of reach for average homeowners unless phased across many years.
Subsequently, the introduction of solid-state lighting technology initiated a structural paradigm shift across the industry. Low-voltage (12V) systems powered by step-down magnetic or electronic transformers became the gold standard for residential properties. Because 12-volt systems carry negligible risk of severe electrical shock and do not require deep subsurface trenching, the labor barrier to entry collapsed. Thus, homeowners gained the capacity to lay direct-burial cable just beneath the turf or mulch line, dramatically lowering installation costs and opening the door to viable do-it-yourself execution.
Simultaneously, the exceptional efficiency gains of light-emitting diodes altered operating economics permanently. Where older halogen systems drew hundreds of watts, illuminating an entire property boundary with equivalent luminous flux using modern LEDs can consume less power than a single traditional floodlight. This dramatic reduction in electrical load transformed transformer sizing requirements. Property owners no longer needed heavy, expensive multi-tap commercial transformers to power a modest layout; instead, compact, highly efficient solid-state drivers sufficed. Ultimately, understanding this historical trajectory clarifies why modern budget planning must exploit low-voltage architectural flexibility rather than replicating outdated high-voltage construction methodologies.
Conceptual Frameworks and Mental Models for Budget-Conscious Design
Navigating financial limits requires structured mental models that prevent emotional purchasing and scope creep. Applying established design frameworks ensures every dollar spent contributes directly to the overarching functional and aesthetic goals of the property.
The Layered Illumination Framework
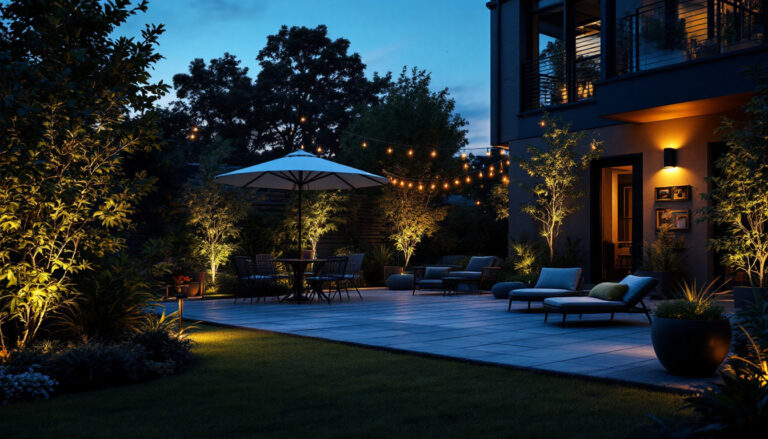
Instead of treating lighting as a uniform wash, this model breaks exterior space into three distinct tiers: ambient (general navigation and safety), task (functional workspaces like outdoor kitchens or steps), and accent (highlighting architectural features, specimen trees, or hardscapes). Accordingly, budget allocation should follow a strict 60-30-10 ratio: sixty percent of resources directed toward foundational safety and navigation, thirty percent toward essential architectural accents, and ten percent held in reserve for fine-tuning or future expansion.
The Lumens-Per-Dollar Optimization Matrix
This analytical approach evaluates fixtures not by their aesthetic appeal in a showroom, but by their luminous efficacy relative to cost. By calculating the cost per lumen delivered at the target surface, buyers can immediately identify overpriced decorative housings and focus on high-efficiency optical assemblies that direct light precisely where needed without wasting energy.
The Phased Deployment Horizon
Capital constraints do not necessitate completing an entire property in a single weekend. The phasing model structures upgrades into sequential, self-contained milestones—Phase 1: Critical egress and security paths; Phase 2: Primary patio and entertaining zones; Phase 3: Perimeter and specimen landscape accenting. Each phase must function independently, allowing the property owner to halt expansion at any budgetary threshold without leaving incomplete, non-functional wiring stubs.
The Total Cost of Ownership (TCO) Equation
A mental model that forces lookahead calculations beyond the point of purchase. TCO accounts for initial hardware acquisition, installation labor (or do-it-yourself time investment), projected annual energy consumption based on local utility rates, and a realistic component failure and replacement timeline over a ten-year horizon.
Key Categories, System Variations, and Trade-Offs
Choosing the correct system architecture is the most consequential financial decision in any exterior lighting project. The market offers distinct categories, each carrying unique structural trade-offs between upfront capital expenditure and long-term durability.
Low-Voltage (12V) Hardwired Systems
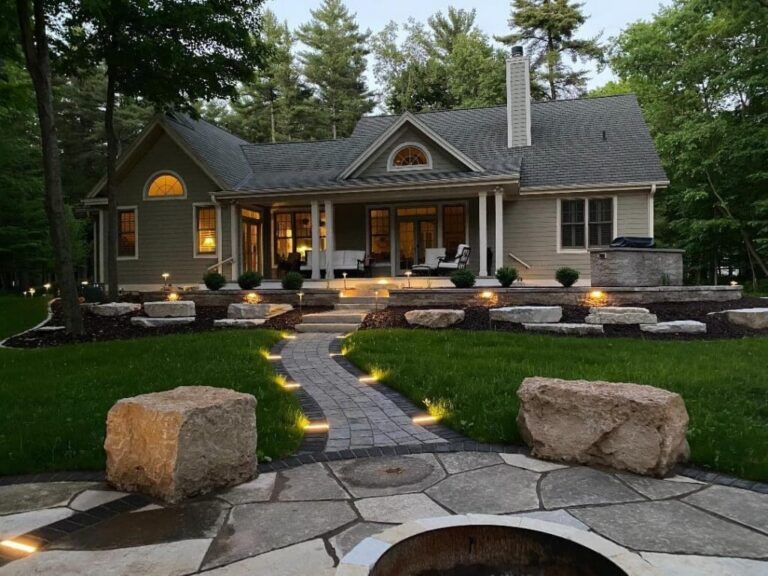
This option stands as the gold standard for residential applications. Powered by a central transformer converting household voltage down to a safe 12 volts, it offers exceptional reliability, dimming capabilities, and professional aesthetics, though initial cable and transformer investments require careful calculation.
Solar-Powered Independent Fixtures
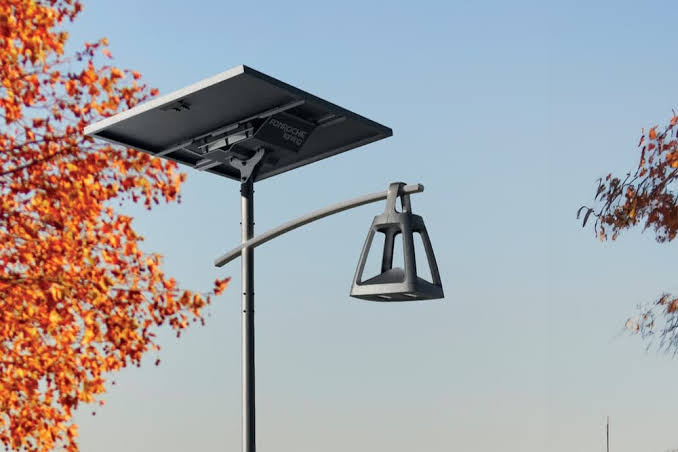
Representing the lowest initial barrier to entry, these systems require zero wiring or trenching. However, performance fluctuates based on regional insolation, seasonal sun angle, and battery degradation, meaning they are best reserved for non-critical aesthetic markers rather than safety pathways.
Line-Voltage (120V) Flood and Security Lighting
Line-voltage setups are mandatory for high-output security floodlights or heavy-duty architectural spot illumination. Although they incur high installation costs due to code requirements, conduit, and deep burial depths, they deliver maximum luminous output.
Plug-and-Play Quick-Connect Systems
These modular consumer-grade kits utilize proprietary connectors. They are extremely budget-friendly and user-installable, but they remain limited by proprietary cable gauges, fixed wattage ceilings, and low resistance to mechanical strain over time.
Integrated LED vs. Retrofit Lamp Fixtures
Integrated units feature sealed LED arrays designed for maximum thermal management and waterproof integrity, yet they require replacing the entire fixture upon diode failure. Conversely, retrofit fixtures accept standard MR16 or wedge-base bulbs, allowing cheap, modular bulb swaps while sacrificing some weather-sealing performance.
Smart-Controlled Ecosystems
These systems integrate with wireless protocols enabling geofencing, scheduling, and color temperature tuning. While they add software complexity and unit cost, they successfully eliminate mechanical timers and photocell failures.
| System Category | Upfront Cost | Installation Complexity | Long-Term Durability | Energy Efficiency | Primary Trade-Off |
| Low-Voltage (12V) | Moderate | Medium (DIY-friendly) | High (Metal housings) | Very High | Requires careful voltage drop math |
| Solar Independent | Low | Very Low (Plug & Play) | Low to Moderate | High (Renewable) | Weather dependency and short lifespans |
| Line-Voltage (120V) | High | High (Licensed electrician) | Very High | Moderate | Rigid installation paths and high labor costs |
| Plug-and-Play Kits | Low | Low | Low | High | Proprietary limitations and weak connectors |
| Smart Ecosystems | Moderate-High | Medium | Moderate | High | Potential software obsolescence and pairing friction |
Realistic Decision Logic
When evaluating these options against a strict budget, properties with existing landscape beds and straightforward layouts should almost exclusively target modular 12-volt systems with replaceable MR16 lamps. Consequently, this combination minimizes labor costs, avoids professional electrical service calls, and ensures that individual component failures do not necessitate trashing an entire lighting assembly.
Detailed Real-World and Implementation Pathways
To translate abstract principles into actionable execution, consider how budget constraints manifest across distinct architectural and environmental conditions.
A : The Sloped Suburban Yard with Drainage and Erosion Risks
-
Constraints: Uneven topography, heavy clay soil prone to shifting, and limited existing exterior electrical outlets.
-
Decision Points: Trenching deep lines is hazardous due to erosion potential; therefore, surface wiring risks snagging during lawn maintenance.
-
Failure Modes: Cable tension failures from ground shifting; furthermore, water pooling in low-slung fixture housings can trigger shorts.
-
Second-Order Effects: Selecting corrosion-resistant brass fixtures and running thicker 10-gauge direct-burial wire prevents voltage drop across long, sloping runs, eliminating the need for multiple transformers despite higher initial cable costs.
B: The Urban Townhouse with Concrete Courtyard and Zero Soil Beds
-
Constraints: Solid concrete footprint, strict homeowner association rules regarding drilling into exterior walls, and zero subsurface digging allowed.
-
Decision Points: Hardwired systems are virtually impossible without expensive core drilling; meanwhile, solar spot units lack aesthetic refinement.
-
Failure Modes: Surface-mounted adhesive channels detaching under thermal expansion; additionally, inadequate sunlight for solar panels due to shadowing from adjacent structures.
-
Second-Order Effects: Utilizing heavy-base weighted uplights or discreetly routing flexible, UV-stable conduit along mortar lines preserves architectural integrity while bypassing destructive concrete cutting.
C : The Rural Homestead with Extensive Perimeter Boundaries
-
Constraints: Massive linear footage, total absence of near-house power sources, and wildlife interference with ground-level cables.
-
Decision Points: Low-voltage line loss over hundreds of feet makes standard 12V transformers ineffective without high-end multi-tap units or expensive thick-gauge wire.
-
Failure Modes: Rodent chewing through direct-burial insulation; consequently, severe voltage drop causes terminal fixtures to dim visibly.
-
Second-Order Effects: Segmenting the property into isolated solar-powered islands for peripheral marking while concentrating a single high-output low-voltage zone immediately around primary dwelling entry points.
Planning, Cost Structures, and Resource Dynamics
Financial efficiency demands granular dissection of project expenses. Budget overruns almost invariably stem from failing to account for indirect costs and material variability.
Direct Costs
-
Fixtures: Housing bodies, optical lenses, internal drivers or sockets.
-
Cabling: Direct-burial stranded copper wire (typically 12-gauge or 10-gauge for low-voltage runs).
-
Power Source: Transformers, timers, astronomical clocks, or photocells.
-
Mounting Hardware: Stakes, core drills, junction boxes, and waterproof wire connectors.
Indirect and Opportunity Costs
-
Tools and Equipment: Manual trenching spades, wire strippers, multimeters for voltage drop testing, masonry bits.
-
Regulatory Compliance: Local permit fees if tying into main dwelling circuits (line-voltage modifications).
-
Time Investment: Weekend labor allocation, troubleshooting wiring faults, adjusting beam alignments after dark.
| Budget Tier | Estimated Total Outlay | Component Quality Baseline | Typical Coverage Scope | Expected Lifespan |
| Minimalist / Entry | $150 – $350 | Composite/Plastic fixtures, basic plug-and-play kits | Front entry path and single focal tree | 2 – 4 years |
| Mid-Range / Optimized | $500 – $1,500 | Cast aluminum/copper fixtures, multi-tap transformer, 12-gauge wire | Full front facade, primary walkway, patio seating area | 8 – 12 years |
| Architectural / Premium | $2,500 – $6,000+ | Solid cast brass fixtures, smart-zoned transformers, thick 10-gauge runs | Complete estate perimeter, extensive hardscapes, multi-zone control | 15+ years |
Tools, Strategies, and Support Systems for Phased Execution
Executing an upgrade efficiently requires specific diagnostic and installation tools that prevent costly errors and reduce physical labor time.
-
Digital Multimeter: Essential for measuring voltage drop at the furthest terminal of a 12-volt run to ensure LEDs do not flicker or suffer driver starvation.
-
Wire Strippers and Crimpers: Precision hand tools that prevent frayed copper strands, which cause high-resistance electrical bottlenecks and premature connector failure.
-
Gel-Filled Waterproof Wire Nuts: Non-negotiable for underground connections; moreover, standard wire nuts oxidize and fail within months in damp soil environments.
-
Rubber Mallet and Trenching Edger: Simplifies the creation of a clean slit in turf for cable burial without destroying lawn aesthetics.
-
Astronomical Timer Switch: Automates dusk-to-dawn operation based on geographic coordinates, thus eliminating the maintenance headaches of mechanical dial timers.
-
Lux Meter: Allows objective measurement of illumination levels to verify that security thresholds are met without light trespass into neighboring properties.
-
Painter’s Tape and Temporary Stakes: Used for daytime mocking up of beam angles and fixture positions before committing to permanent placement.
Risk Landscape, Failure Modes, and Mitigation Strategies
Exterior electrical systems operate in hostile environments characterized by moisture, thermal expansion, mechanical disturbance, and biological activity. Anticipating failure modes protects the initial capital investment.
Voltage Drop and Undervoltage
-
Risk: As electrical current travels down a wire, resistance causes voltage to drop. In 12-volt systems, terminals dropping below 10.5 volts cause LED lamps to flicker or fail prematurely.
-
Mitigation: Use thicker wire gauges for long runs, keep total wattage well below transformer capacity, and utilize loop wiring topologies where feasible.
Moisture Ingress and Ground Faults
-
Risk: Irrigation water, heavy rainfall, and morning dew infiltrate poor wire splices, tripping breakers or corroding brass contacts.
-
Mitigation: Never use standard indoor wire connectors. Instead, employ dielectric grease and gel-filled waterproof wire nuts, elevating splices slightly above grade inside protective junction enclosures.
Mechanical Severing during Maintenance
-
Risk: Lawn aerators, shovels, and edgers slicing through shallow-buried direct-burial cables.
-
Mitigation: Bury low-voltage lines at a minimum depth of 4 inches, or route them through flexible PVC conduit beneath high-traffic garden bed edges.
Thermal Overload and Enclosure Failure
-
Risk: Inadequate ventilation or excessive wattage running through enclosed fixtures causing rapid LED degradation.
-
Mitigation: Strictly adhere to maximum wattage ratings specified by fixture manufacturers and use high-grade thermal-managed LED lamps.
Governance, Maintenance, and Long-Term Adaptation
An upgraded lighting system is not a set-it-and-forget-it installation. Establishing a light governance protocol ensures longevity and maintains optimal visual performance as landscaping matures.
Monitoring and Review Cycles
-
Quarterly Visual Inspections: Check for shifted fixture angles caused by foot traffic, lawn maintenance crews, or soil settling.
-
Semi-Annual Lens Cleaning: Remove hard water mineral deposits, pollen, and mud splatters from glass lenses to maintain peak lumen transmission.
-
Annual Electrical Audit: Measure terminal voltages with a multimeter to detect developing high-resistance corrosion in wire splices before complete failure occurs.
Adjustment Triggers
-
Foliage Growth: As shrubs and trees expand, previous uplighting paths become obstructed. Therefore, plan for annual trimming or physical repositioning of fixtures to prevent light blockage and fire hazards against dry leaves.
-
Seasonal Sun Adjustments: Recalibrate astronomical timers and photocell sensitivity thresholds as daylight hours shift across equinoxes.
Layered Maintenance Checklist
-
Inspect all above-ground cabling for insulation cracking caused by ultraviolet exposure.
-
Verify transformer circuit breaker health and clear debris from cooling fins.
-
Test manual override and smart-app connectivity protocols.
-
Replace degraded zip-ties or mounting stakes showing structural fatigue.
Measurement, Tracking, and Evaluation Metrics
To validate whether a budget-conscious lighting project succeeded, property owners must evaluate performance across quantitative and qualitative dimensions.
Leading vs. Lagging Indicators
-
Leading Indicators: Proper voltage readings at installation, correct cable gauge selection, and secure waterproof connections executed on day one. These metrics predict long-term reliability.
-
Lagging Indicators: Total energy bill fluctuations, frequency of bulb replacements over twenty-four months, and absence of weather-related outages.
Quantitative and Qualitative Signals
-
Quantitative Metrics: Watts consumed per square foot of illuminated space, total capital expenditure relative to projected lifespan, and lumen output per dollar.
-
Qualitative Signals: Elimination of dark shadow zones along high-risk steps, balanced visual harmony across architectural elements, and freedom from glaring light pollution directed into neighbor windows.
Documentation Frameworks
Maintaining a simple system binder or digital log prevents guesswork during future expansions:
-
Circuit Map: A hand-drawn sketch detailing transformer terminal locations, cable runs, and fixture wattages per zone.
-
Component Inventory: Serial numbers, bulb types, and manufacturer part numbers for easy exact-match replacements.
-
Financial Ledger: Itemized receipts and warranty expiration dates for all hardware investments.
Common Misconceptions, Myths, and Oversimplifications
Navigating lighting upgrades successfully requires dispelling persistent marketplace myths that inflate budgets without adding value.
-
Myth 1: Higher Wattage Always Means Better Security: In reality, extreme high-lumen glare creates blinding shadows where intruders can hide. Controlled, even illumination is vastly superior to blinding floodlights.
-
Myth 2: Solar Fixtures Can Fully Replace Hardwired Low-Voltage Systems: While useful for accent markers, consumer-grade solar units lack the luminous power and reliability required for critical path safety lighting in cloudy or winter climates.
-
Myth 3: All LED Bulbs Are Interchangeable: Cheap retrofit LEDs often lack proper rectification circuitry, causing severe flickering when paired with standard magnetic low-voltage transformers.
-
Myth 4: Direct-Burial Cable Requires Deep Trenching: Unlike 120V lines, 12V low-voltage wire does not require deep burial codes, saving immense labor time by needing only a shallow turf slit.
-
Myth 5: Waterproof Means Submersible: Many standard exterior fixtures withstand rainfall; however, they will fail rapidly if placed in continuously pooling water or sub-grade drainage channels.
-
Myth 6: Transformers Can Be Loaded to 100% Capacity Safely: Professional installation standards dictate leaving a 20 percent safety buffer on transformer capacity to accommodate voltage surges and thermal derating.
Ethical, Practical, and Contextual Considerations
Responsible exterior illumination extends beyond property lines, factoring in local ecology, wildlife, and nocturnal ecosystems. Excessive blue-spectrum light pollution disrupts migratory birds, disorients nocturnal pollinators, and suppresses natural melatonin production in humans and local fauna.
Budget-conscious upgrades naturally align with ecological responsibility when adhering to warm color temperatures (2700K or lower, leaning toward amber or warm white). Warm spectrum LEDs emit minimal short-wavelength blue light, reducing insect attraction and environmental disruption. Furthermore, utilizing shielded, down-directed fixtures ensures that light remains on the property where it serves a functional purpose, eliminating light trespass into the night sky and respecting neighboring environments.
Conclusion
Planning exterior illumination under financial constraints is an exercise in applied engineering and spatial prioritization. By discarding the illusion that high cost equates to high quality, property owners can construct resilient, elegant, and efficient lighting systems through disciplined adherence to foundational principles. Success rests on selecting modular low-voltage architecture, respecting electrical load dynamics, calculating true total cost of ownership, and phasing investments logically over time. Through patient execution and rigorous planning, budget-restricted upgrades yield sophisticated architectural transformations that endure for decades.